Note: Unlike most of the other tech projects I’ve written about on this website, this is not a software development project. Instead, this project focuses on the setup and integration of existing hardware and software to achieve live TV streaming capabilities. To read about my software development projects, check out the Development tag.
Introduction
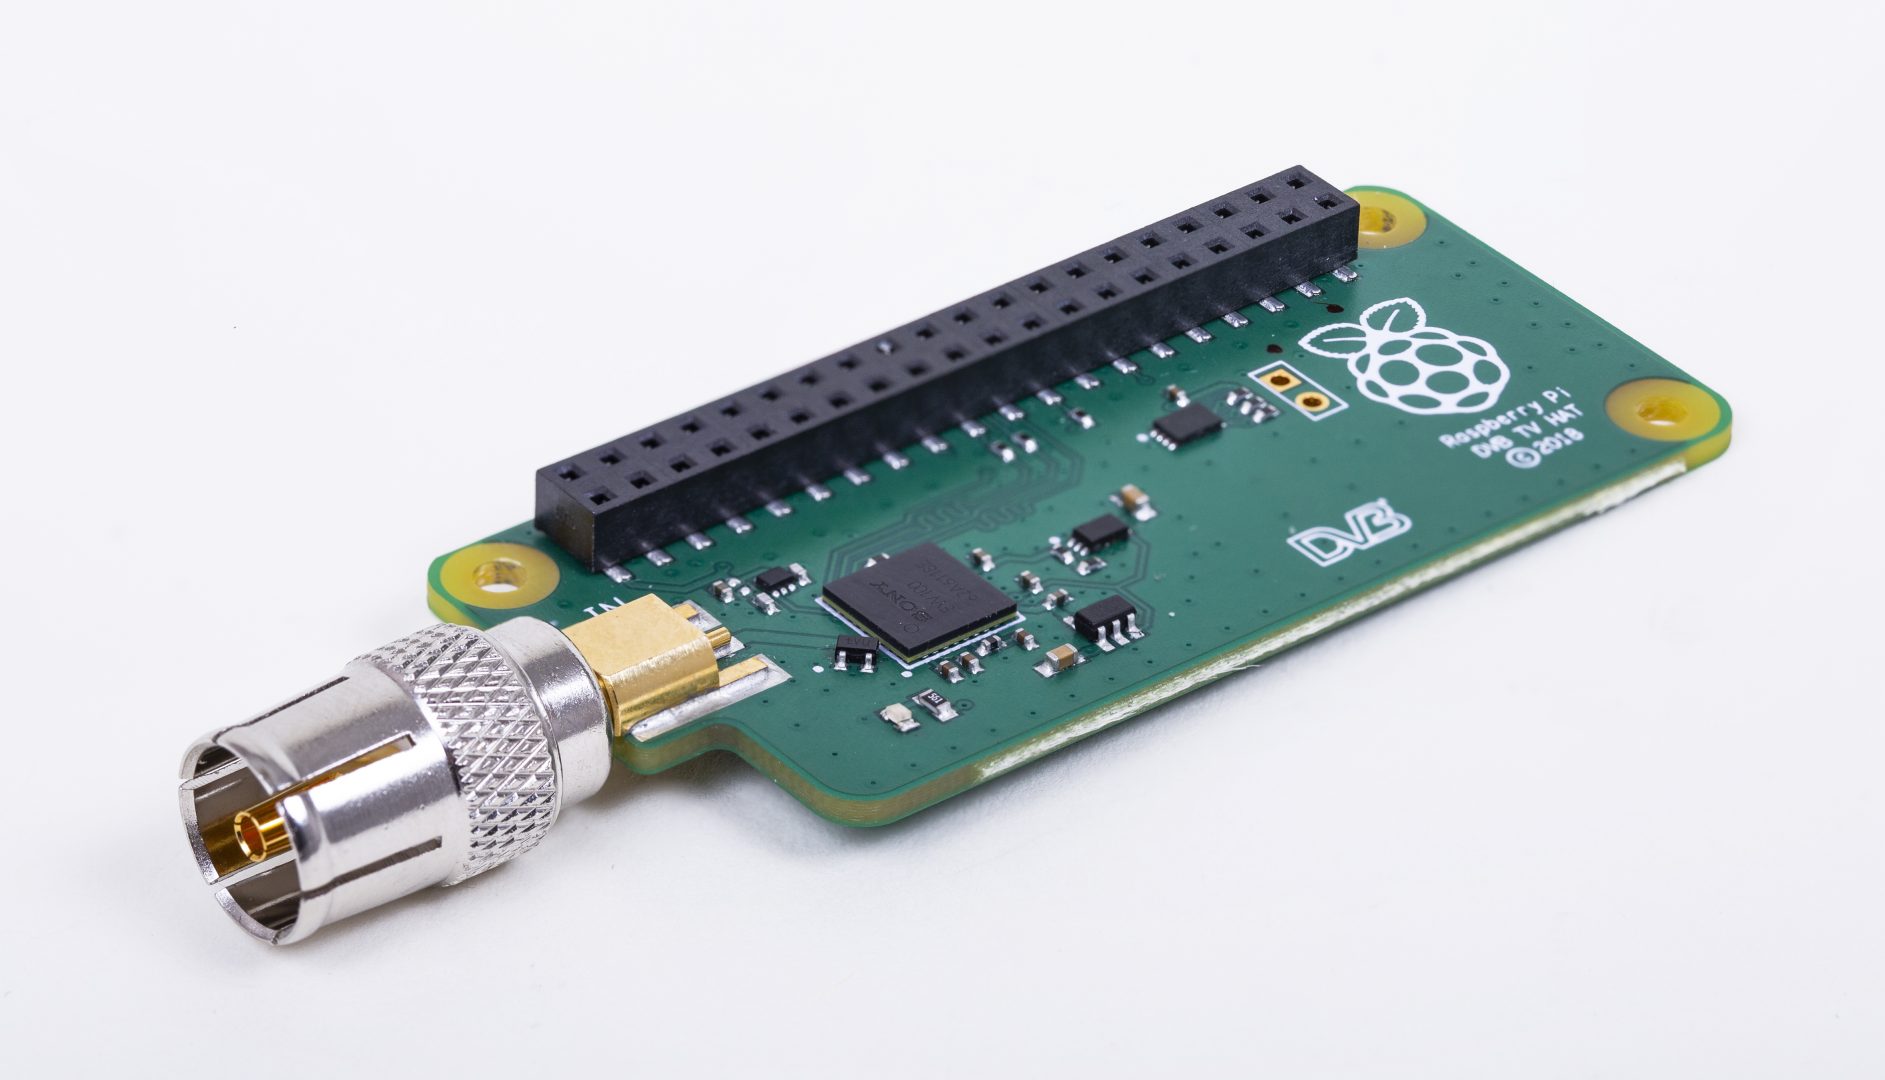
In 2018, Raspberry Pi released the Raspberry Pi TV HAT add-on, which allows a Raspberry Pi to be connected to an antenna and to receive DVB-T2 TV streams.
Receiving TV streams on a Pi is cool in itself, but an even more exciting capability this unlocks is that the Raspberry Pi can be set up as a server to then stream digital TV to devices over a network.
I set out to achieve this using the open-source tvheadend streaming server software in combination with a Plex media server, all running on the Raspberry Pi.
With a premium tier Plex account, you gain access to live TV & DVR capabilities for your Plex server. To use this, you’d need to hook up a tuner device to your network. Instead of using a dedicated TV tuner device, I set up a tvheadend server on the Raspberry Pi hosting the Plex media server, which makes use of the “TV HAT” add-on to receive live TV streams.
Setup
Building the Raspberry Pi
Firstly, I prepared the Raspberry Pi hardware by attaching a Raspberry Pi TV HAT to a Raspberry Pi 2 Model B, and assembling plastic casing around it for protection. I also inserted a 64GB SD card for storage, a USB Bluetooth receiver (to use a wireless keyboard with the Raspberry Pi) and a USB WiFi dongle.
For the initial setup, I hooked the Pi up to a computer monitor via HDMI, though when complete the device does not need a dedicated display.
Operating System
For the first software setup step, I installed the Debian-based OS Raspbian on the Raspberry Pi. The setup process of Raspbian is a straightforward Linux OS setup which involved writing an image to the SD card and mostly following on-screen instructions. This is documented thoroughly in many places online.
After this, I did some initial preparation work in configuring the device’s Wifi settings etc.
Plex Media Server
The next step was to install Plex Media Server on the Raspberry Pi, as I will be using Plex clients (e.g. on a smartphone / smart TV / other devices) to access the live TV streams.
This is something I’d completed as a previous project and again is documented thoroughly online, but essentially after a few initial precursor steps, can be installed with the following command:
sudo apt install plexmediaserver
Static IP Address
With the Plex Media Server installed, it can now be accessed anywhere on the network by entering the device’s IP address via the port the Plex Media Server is configured to use (32400 by default). However, I want this IP address to remain consistent so that my Plex clients don’t need to reconfigure the Plex server IP address every time I reboot the Raspberry Pi.
To configure this on the Raspberry Pi itself*, the /boot/cmdline.txt file can be edited to specify the static IP address that should be used.
- Get the current IP address using
hostname -I - Open
cmdline.txtfor editing usingsudo nano /boot/cmdline.txt - At the end of this file, add the following line, replacing
CURRENT_ADDRESSwith the current IP address obtained in step 1:ip=CURRENT_ADDRESS - Save and exit the file (
CTRL+X, thenY, thenEnter) - Restart the Raspberry Pi (
sudo reboot)
*This can also likely be achieved by configuring your router to assign a static IP to the Raspberry Pi based on its MAC address.
Tvheadend
In order for Plex to use TV streams to provide live TV & DVR features, a TV streaming & DVR server must be used, which is where tvheadend comes in. Tvheadend is a free and open-source TV streaming server and recorder for Linux which can output TV streams in a number of formats. These streams can then be picked up by the Plex Media Server and distributed to Plex clients.
Tvheadend can be installed with the following command:
sudo apt-get install tvheadend
After following some initial setup steps such as setting up a username and password, tvheadend can be accessed from any machine in the network at the Pi’s IP address on the port tvheadend is configured to use (9981 by default). You can log in using the username and password specified on the Raspberry Pi. This is where much of the remaining configuration takes place.
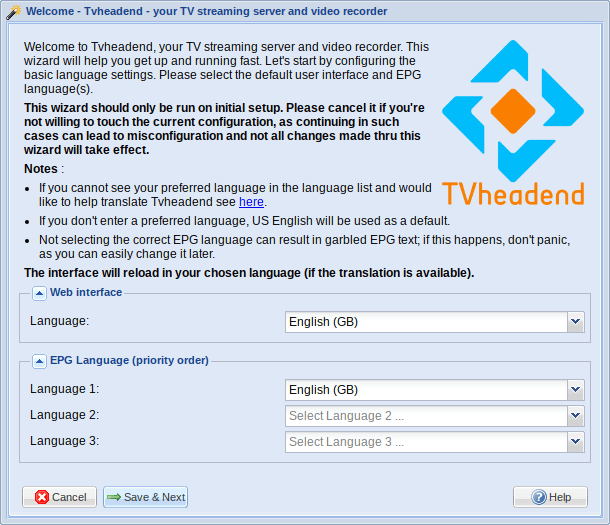
After logging into the tvheadend web app (at http://PI_IP_GOES_HERE:9981), a configuration wizard will appear asking for some initial language specifications.
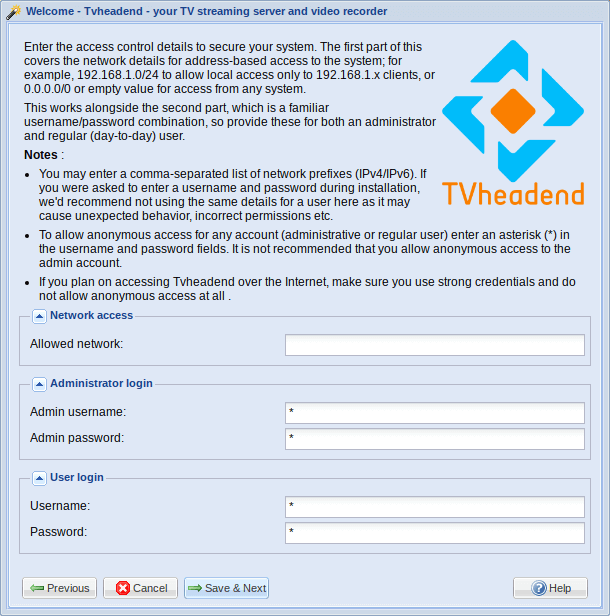
Next comes access control configuration (can enter * in username and password fields to allow anonymous access, or enter a username and password).
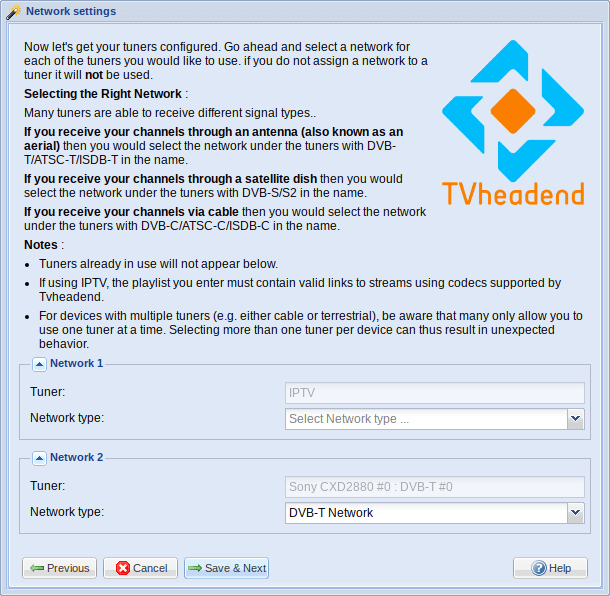
Then, it is time to configure the tuners. Under “Network 1”, then IPTV fields can be left blank. Under “Network 2” however, the “Tuner” should be set to “Sony CXD2880 #0 : DBT-T #0”, which is the TV HAT. The “Network Type” should be set to “DVB-T Network”.
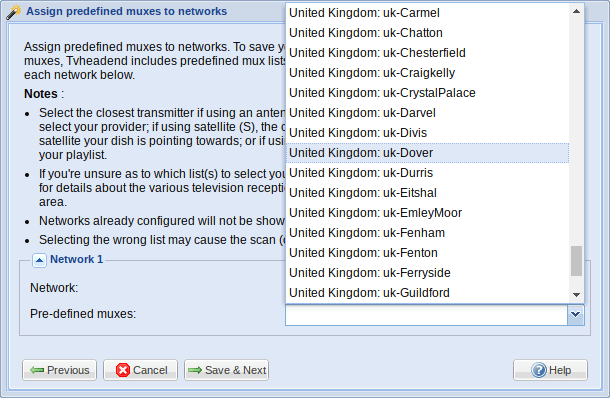
The next step is to configure multiplexers, or “muxes”. For this step, in the “Pre-defined muxes” drop-down, the transmitter that will give you the best signal should be selected (e.g. the closest transmitter, or one that your aerial is optimally positioned to receive data from). Online tools such as Freeview’s channel checker can be helpful to determine which transmitter to select.
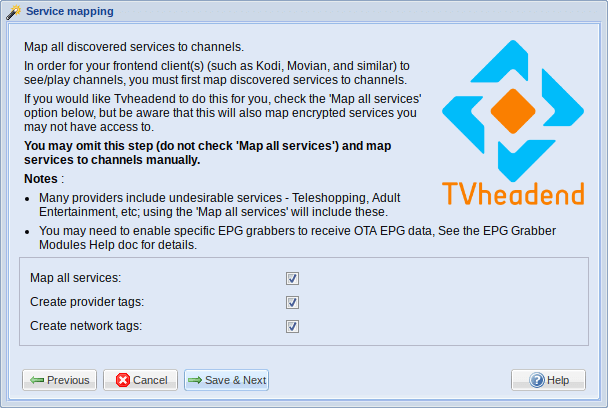
After clicking “Save & Next” on this screen, a scan will commence to find muxes / services based on the settings you input. After this, you can map discovered services to channels, then the initial setup is complete.
Finally, reboot the device (sudo reboot).
After this, you can also use the tvheadend web application UI to re-scan for services (Configuration > DVB Inputs > Networks) and re-map them (Configuration > DVB Inputs > Services) if required. Likewise you can re-run the EPG grabber (Configuration > Channel / EPG > EPG Grabber) to re-collect TV guide information.
Tvheadend Plex Account
In the tvheadend web app (http://PI_IP_GOES_HERE:9981), add an account for the Plex server to use (Configuration > Users > Passwords).
Next, navigate to the “Access Entries” page (Configuration > Users > Access Entries), and click on the “Add” button. Here, enter the Plex server username configured in the previous step, tick the “Web interface” box, set “Streaming” and “Video Recorder” to “Basic”, and click “Apply”.
tvhProxy
In order to allow the Plex Media Server to use the streams that are output by the tvheadend server, tvhProxy can be used.
I followed steps to configure this detailed here.
After setting up tvhProxy, the “Live TV & DVR” page in the Plex Media Server app allows the Raspberry Pi tuner to be selected after clicking “Add Device”. After this point, plex will create a TV guide within a few minutes, and then you can watch live TV / create recordings from Plex clients, all being delivered via your Raspberry Pi!